How to automate website content with Swashi
Learn how to automate website content in Swashi: add keywords, choose a category and target site, set a frequency, switch on SEO features and track usage.
- 1Open Website Content. Click Website Content in the sidebar to open the Content Configuration panel.
- 2Enter a topic or keyword. Type the keyword you want to rank for in the TOPIC / KEYWORD field.
- 3Choose a category. Pick a category under SELECT CATEGORY, or click Add New Category to create your own.
- 4Choose the target site. Under TARGET SITE, pick one connected website or choose Auto-Switch to rotate between your sites.
- 5Set the frequency. Under FREQUENCY, choose Daily, Weekly, Bi-Weekly or Monthly.
- 6Add to the queue. Click + Add to Queue; the topic appears in your ACTIVE QUEUE until it is written and published.
- 7Switch on optimization. Turn on the optimization features you want, such as Schema Markup, Auto Internal Linking and Auto Image Alt Text.
- 8Check your schedule and usage. Use the Website Schedule calendar to see publish days and Plan & Usage to see what your plan has left this month.
Prefer to watch? This tutorial walks through the same steps in the live app. All tutorials →
To automate website content in Swashi, open Website Content, enter the keyword you want to rank for, pick a category and a target site, choose how often to publish, and click + Add to Queue. Swashi then writes each article, adds the SEO features you switched on, and publishes it to your connected website on schedule.
This guide is for business owners and marketers who want a steady flow of search-friendly articles without writing each one by hand. It follows the EP4 video tutorial, "How to Automate Website Content for SEO, AEO, GEO on Swashi."
Before you start
- Connect a website. Articles publish to a site you connect in Website Settings. If you have not done this yet, follow connect your website first.
- Teach your Business Brain. When a site uses your Business Brain, articles follow your brand voice, products and facts.
- Know your plan. Every plan includes a monthly number of articles (see the table below).
Part 1: Plan your content
The top of the page is the Content Configuration panel. This is where you tell Swashi what to write about, where to publish it and how often.
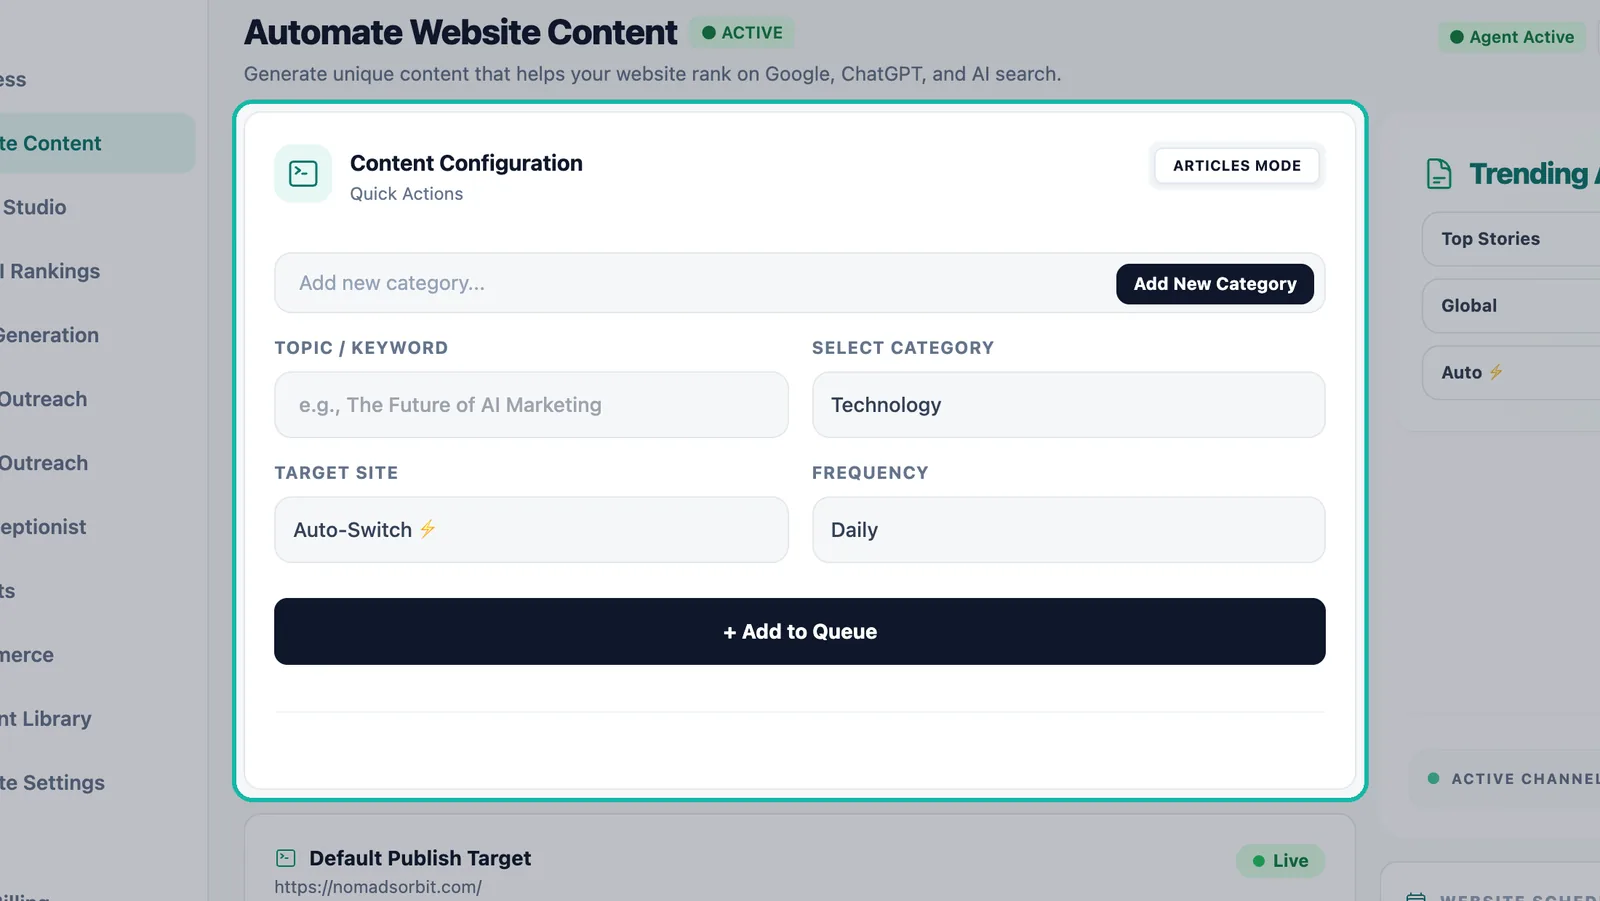
Click Website Content in the sidebar. The page is headed Automate Website Content.
Pick a topic or keyword. Type into TOPIC / KEYWORD (for example, "The Future of AI Marketing"). Swashi plans the article around this keyword.
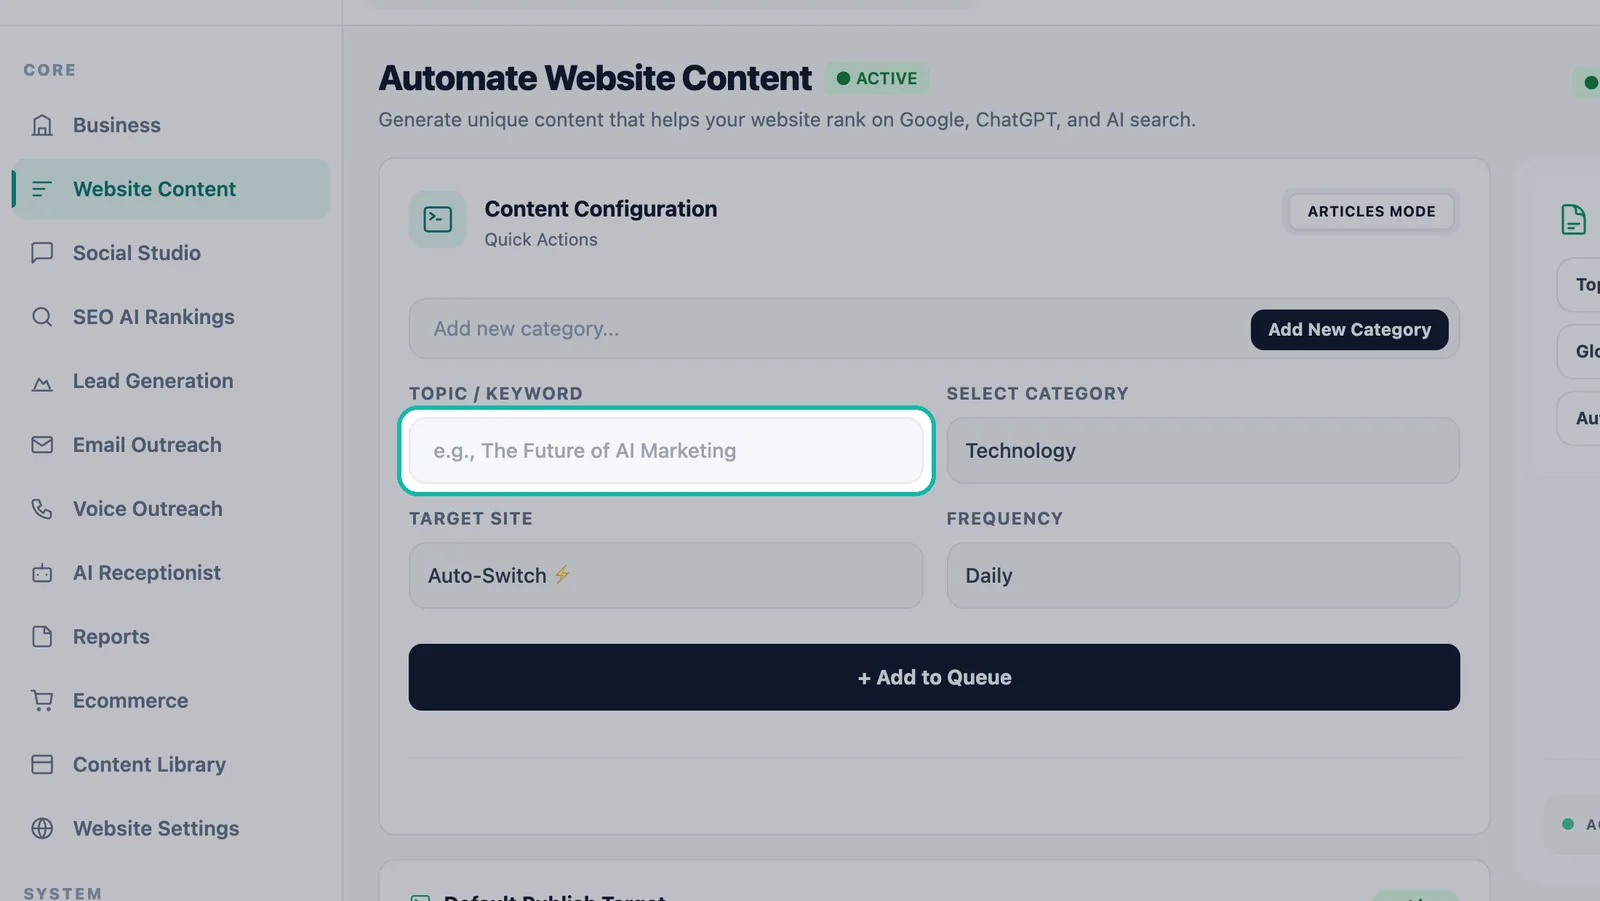
Type the keyword you want to rank for. Choose a category. Under SELECT CATEGORY, choose General, Technology, Marketing, Business or Finance. Click Add New Category to create one that matches your site. Categories keep your articles organized on your website.
Choose the target site. Under TARGET SITE, pick one connected website, or choose Auto-Switch to rotate articles between your sites.
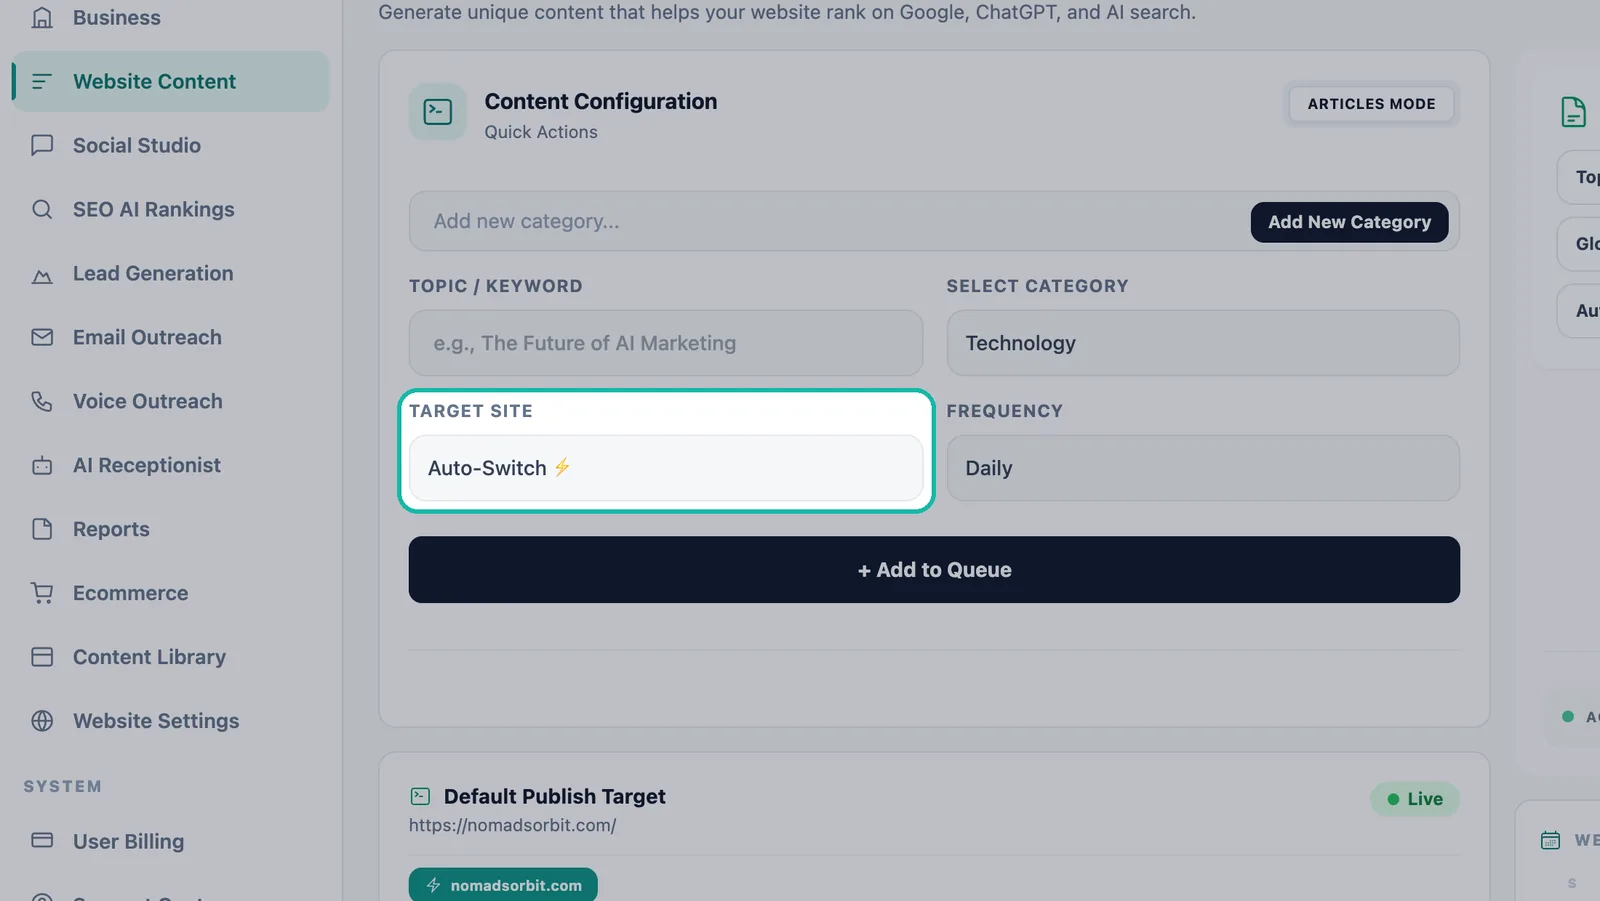
Pick one site or let Auto-Switch rotate between them. Set the frequency. Under FREQUENCY, choose Daily, Weekly, Bi-Weekly or Monthly. Swashi keeps publishing on that schedule.
Click + Add to Queue. One click adds the topic to your content queue.
Check your publish target. The Default Publish Target card shows the website your articles go to and whether they publish Live.
Review your queue. Every planned article waits in the ACTIVE QUEUE until it is written and published. When the queue is empty, it reads "The queue is empty. Add a keyword above to start."
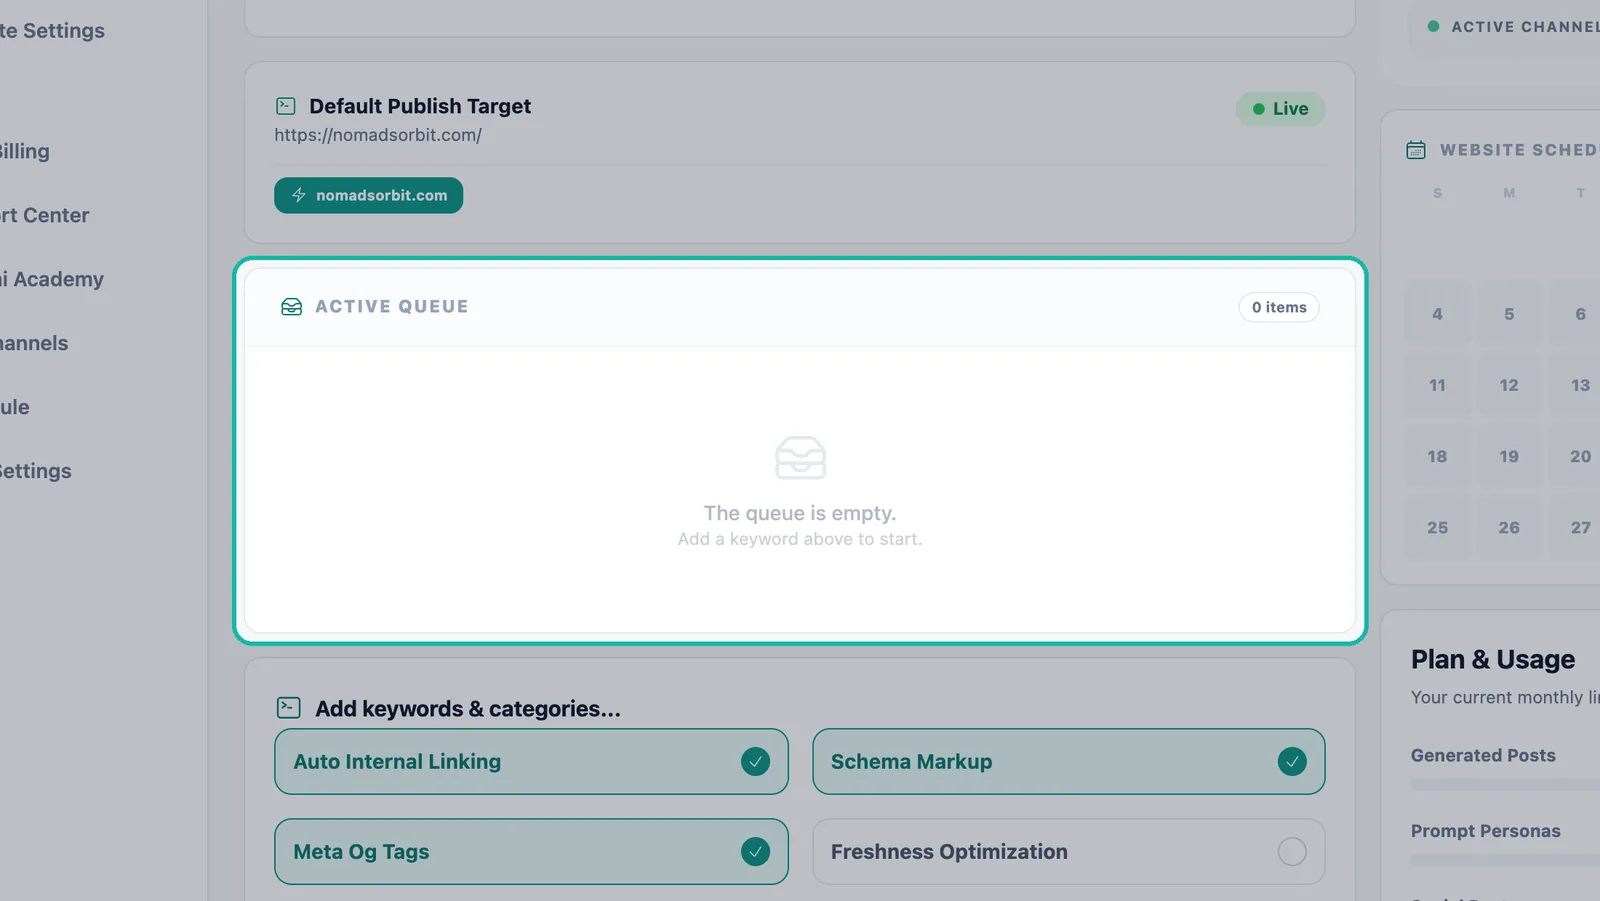
Planned articles wait in the Active Queue.
Tip:Add several keywords on related subjects. Grouping articles around one theme makes it easier to link them together and to build depth on the subjects you want to be known for.
Queue statuses
| Status | What it means |
|---|---|
| In Queue | Planned and waiting for its turn |
| Generating... | Swashi is writing the article now |
| Draft | Written but not published live |
| Completed | Written and published |
| Failed | Something stopped the article; check your website connection and try again |
You can reschedule or delete a queued task from the queue.
Part 2: Optimize for SEO, AEO and GEO
Below the queue you will find the optimization switches. Turn a feature on once and Swashi adds it to every article from then on.
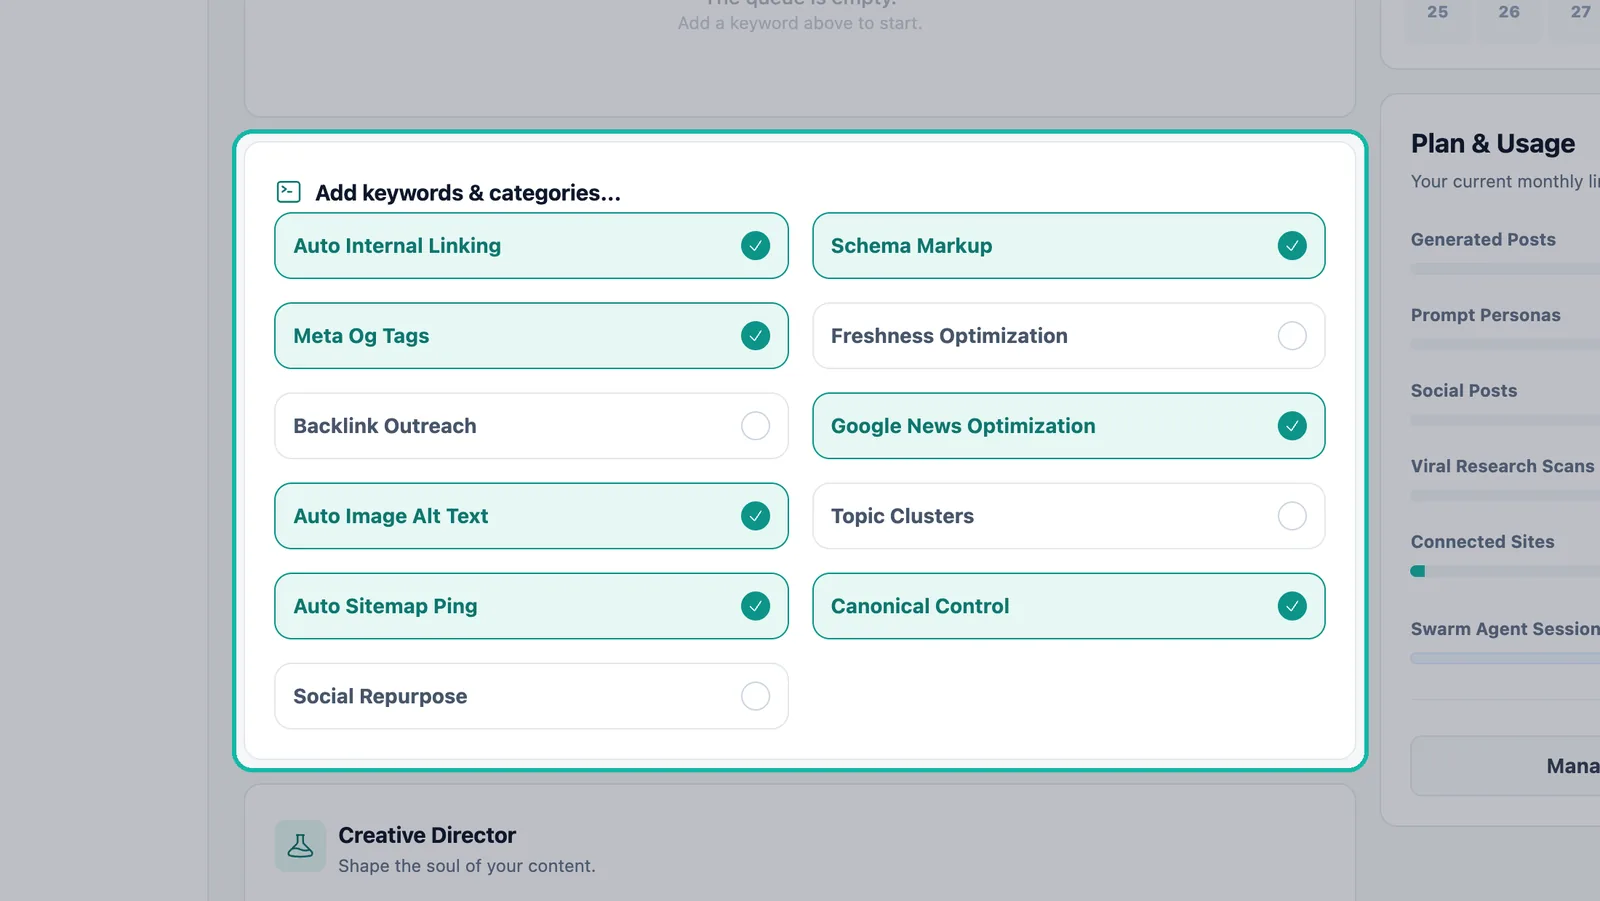
| Switch | What it adds |
|---|---|
| Schema Markup | Structured data that helps search engines and AI assistants understand your content |
| Auto Internal Linking | Links between your own articles |
| Auto Image Alt Text | Keyword-rich alt text on every published image |
| Auto Sitemap Ping | Lets search engines know new pages exist |
| Canonical Control | Tells search engines which version of a page is the main one |
The panel also lists Meta Og Tags, Freshness Optimization, Backlink Outreach, Google News Optimization, Topic Clusters and Social Repurpose. Switch on the ones that suit your site.
Structured data helps search engines and AI assistants understand your content. That matters for AEO (answer engine optimization) and GEO (generative engine optimization) as well as classic SEO, and you can measure both in SEO AI Rankings.
Next, the Creative Director panel lets you shape the voice of your content: start from a source link, choose a writer persona and add your own instructions. It has its own guide: writer personas and style. When you change settings there, click Save All Changes so they apply to every article.
See your schedule
The Website Schedule calendar shows which day each article goes live. The Schedule page in the sidebar shows every scheduled article and social post together, including several on the same day.
Track your plan and usage
The Plan & Usage panel shows your current monthly limits: Generated Posts, Prompt Personas, Social Posts, Viral Research Scans and Connected Sites. Use Manage Subscription to change your plan.
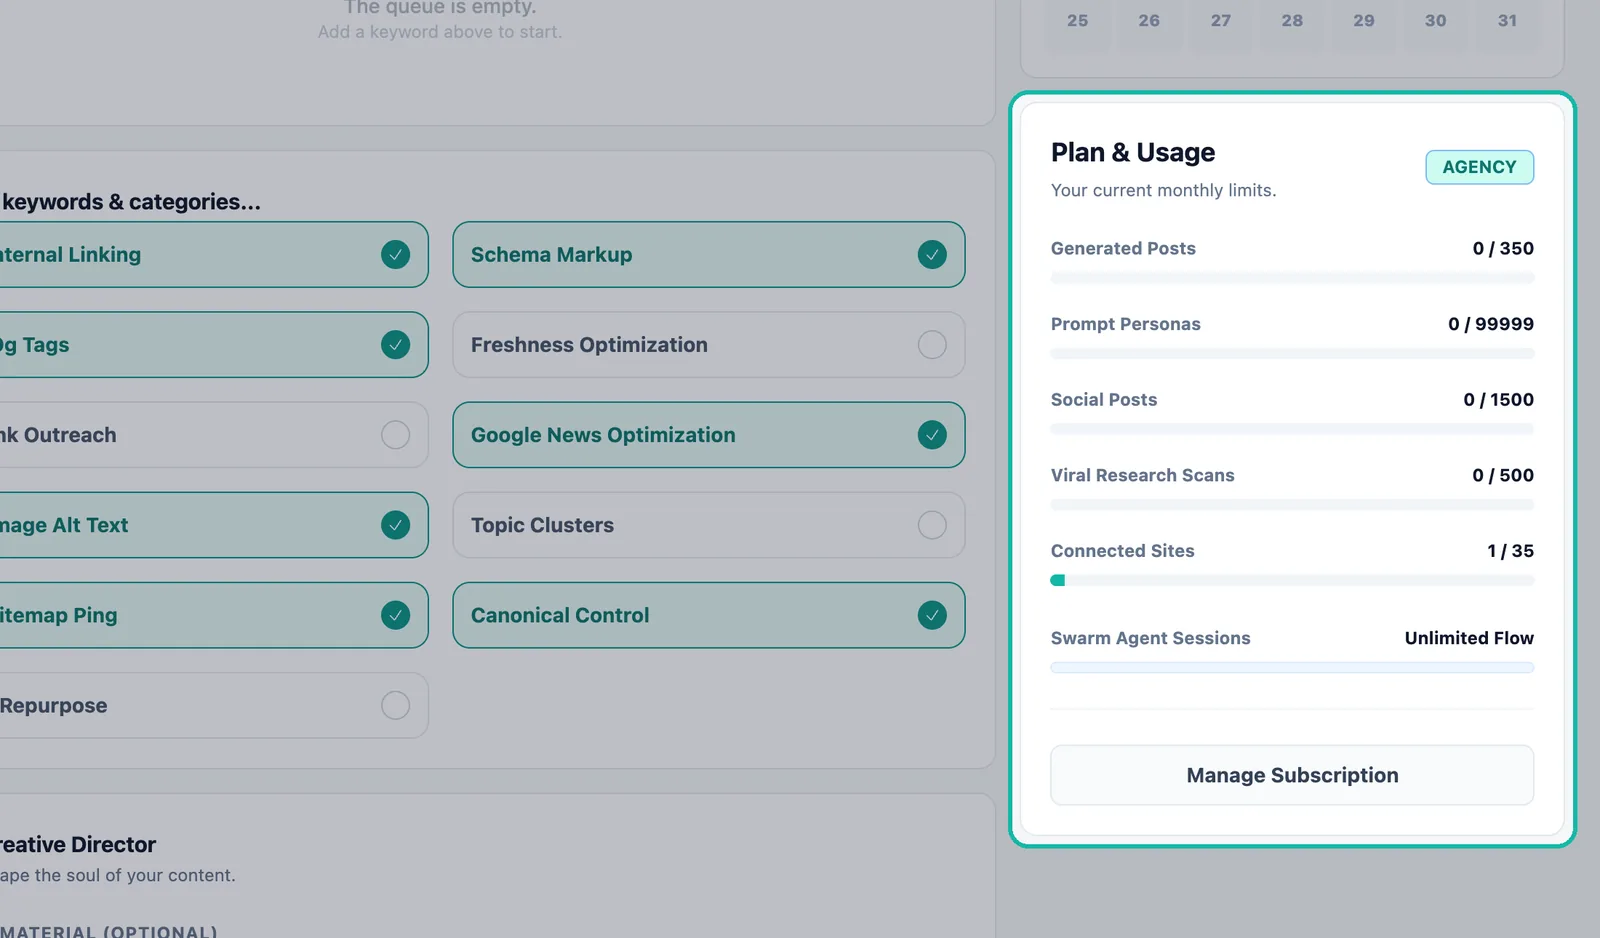
| Plan | Articles per month | Connected sites |
|---|---|---|
| Free | 1 | 1 |
| Starter | 10 | 3 |
| Growth | 75 | 10 |
| Agency | 350 | 35 |
| Enterprise | Unlimited | 150 |
Your article allowance resets each month, and unused articles do not carry over. Need more? The Auto-Post Pack adds extra articles and the Website Pack adds more sites. See current prices on the pricing page.
Where your articles live
Every article Swashi writes is kept in Content Library. From there you can open an article, use Copy HTML, or create a social media draft from it in Social Studio.
Troubleshooting
- "No website selected" or "No websites connected": connect a site in Website Settings first.
- "Queue is empty. Add keywords first.": add at least one topic with + Add to Queue.
- An article shows Failed: check that your website connection is still active in Website Settings, then add the topic again.
Next steps
- Connect your website so articles publish automatically.
- Choose a writer persona and style.
- Track your rankings in SEO AI Rankings.
- See what content automation can do for your business.
Frequently asked questions
Do I need a connected website before I can automate content?+
Yes, to publish automatically. Articles go live on the website you connect in Website Settings. Until a site is connected, the Target Site field shows that no website is connected.
What does Auto-Switch do?+
Auto-Switch rotates new articles between your connected websites instead of sending every article to one site. Choose a single site in Target Site if you want everything on one website.
How many articles can I publish each month?+
It depends on your plan: Free includes 1 article a month, Starter 10, Growth 75, Agency 350 and Enterprise is unlimited. The Plan & Usage panel shows how many you have used.
Does Swashi add SEO features like schema and alt text automatically?+
Yes, once you switch them on. Features such as Schema Markup, Auto Internal Linking, Auto Image Alt Text, Auto Sitemap Ping and Canonical Control are then added to every article.
Can I write articles in languages other than English?+
Yes. Swashi writes in 18 languages, and each connected site has its own detected language. You can also set a separate language for content generation in your advanced language settings.