How to import your own leads from CSV, Apollo, Hunter or HubSpot
Learn how to import your own leads into Swashi from CSV, Apollo, Hunter, LinkedIn Sales Navigator or HubSpot, which columns you need, and how rows are cleaned.
- 1Prepare your CSV. Export your list as a CSV with an email column plus at least one of company, name or business_name.
- 2Open Email Outreach. Click Email Outreach in the sidebar.
- 3Find Import Your Own Leads. Scroll to the Import Your Own Leads panel and choose your source: Apollo.io, Hunter.io, LinkedIn Sales Nav, HubSpot or Custom CSV.
- 4Upload the file. Drag and drop your CSV onto the panel, or click to browse, then click Import Leads.
- 5Check the result. Read the summary of rows imported, skipped for having no email, and duplicates ignored.
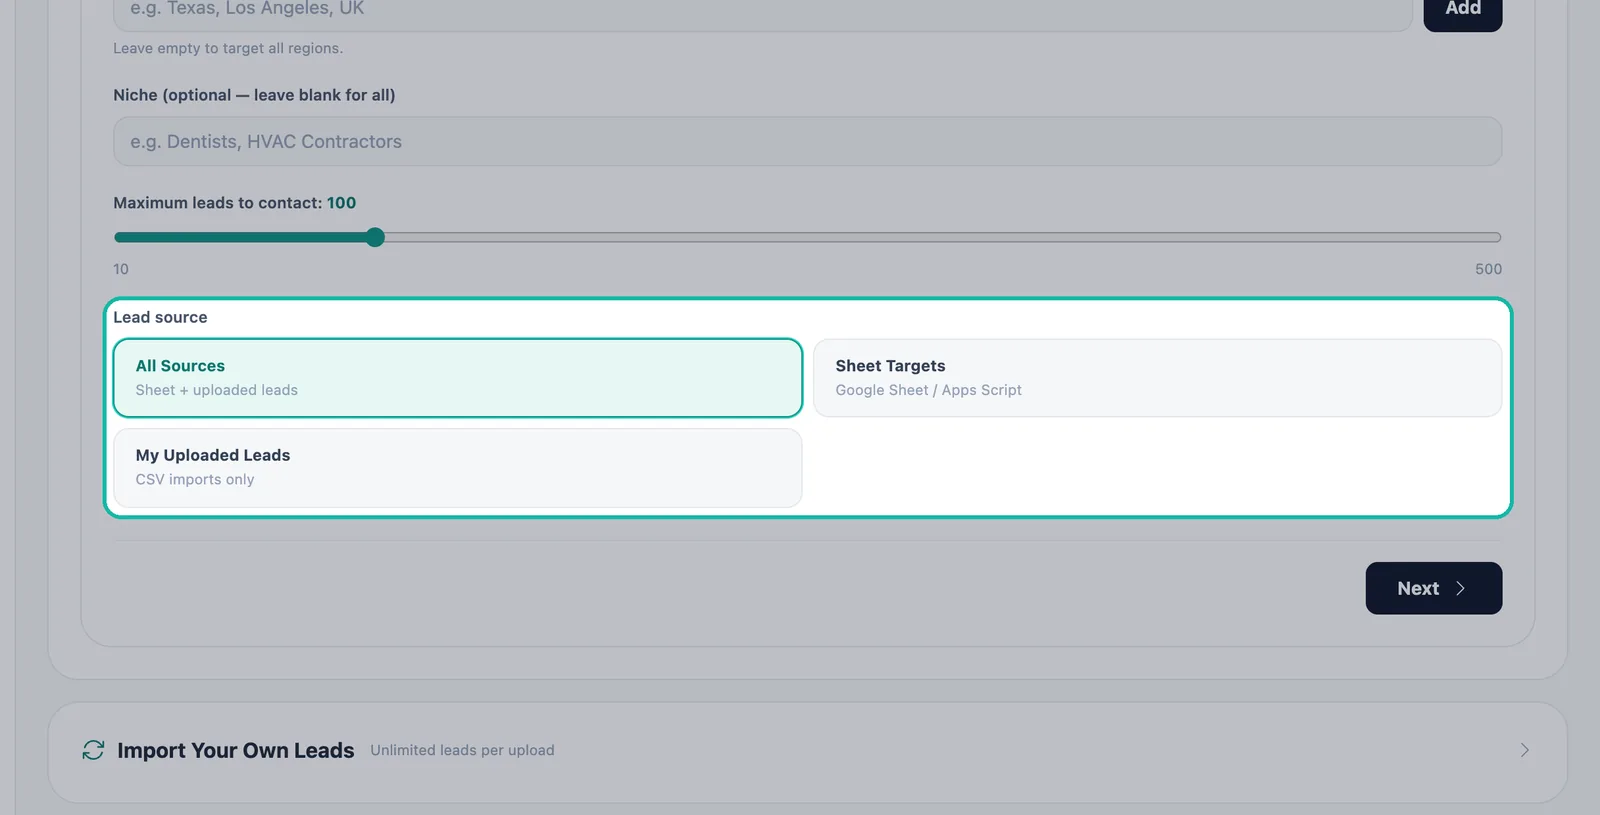
- 6Use the leads in a campaign. In the campaign Audience step, choose My Uploaded Leads or All Sources as the lead source.
Prefer to watch? This tutorial walks through the same steps in the live app. All tutorials →
You can bring your own lead list into Swashi by uploading a CSV in the Import Your Own Leads panel on the Email Outreach page. Swashi accepts exports from Apollo, Hunter, LinkedIn Sales Navigator, HubSpot or any custom CSV. All you need is an email column plus a company or name column. Swashi then cleans, validates and scores the list so your Outreach Agent can contact it.
Product: Lead Gen & Outreach Automation
This page explains who can import, how to prepare your file, what happens to each row, and how to use imported leads in a campaign. It matches part three of the EP6 video tutorial.
Before you start
- Plan: importing your own leads is available on the Growth, Agency and Enterprise plans. On other plans the panel shows an upgrade prompt. See plans and billing.
- Permission: only import contacts you are allowed to email. Swashi does not suggest buying lists, and good outreach depends on a clean, relevant list. See compliance and unsubscribe.
- A connected mailbox is needed before a campaign can send to these leads. See connect a sending account.
Prepare your file
Export your contacts from your current tool as a CSV file. The panel lists these sources: Apollo.io, Hunter.io, LinkedIn Sales Nav, HubSpot and Custom CSV.
| Column | Required? | Notes |
|---|---|---|
| Required | Each row needs a valid email address. Rows without one are skipped. | |
| company | One of these three is required | The company the person works for. |
| name | The person's name. | |
| business_name | The business name, if you use this instead of company. |
Tip:Add a name column even if you have a company column. Campaign messages can fill in variables such as the first name, business and city for each lead, so the more you include, the more personal each email can be.
Import the file
Click Email Outreach in the sidebar.
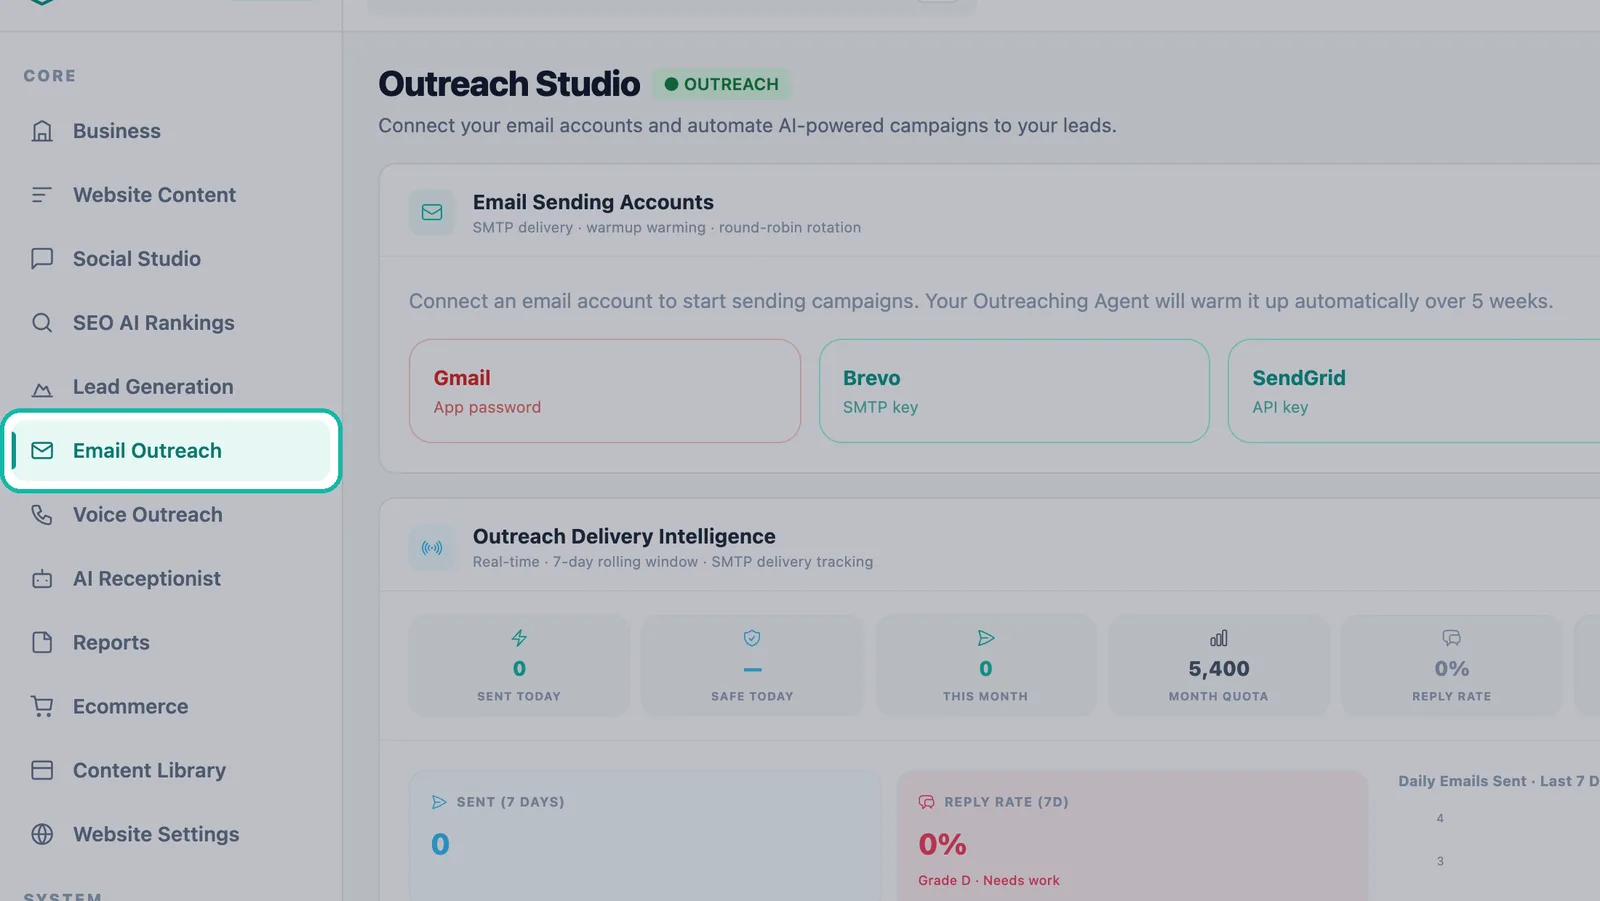
Imports live on the Email Outreach page. Find the panel titled Import Your Own Leads. On eligible plans it shows Unlimited leads per upload.
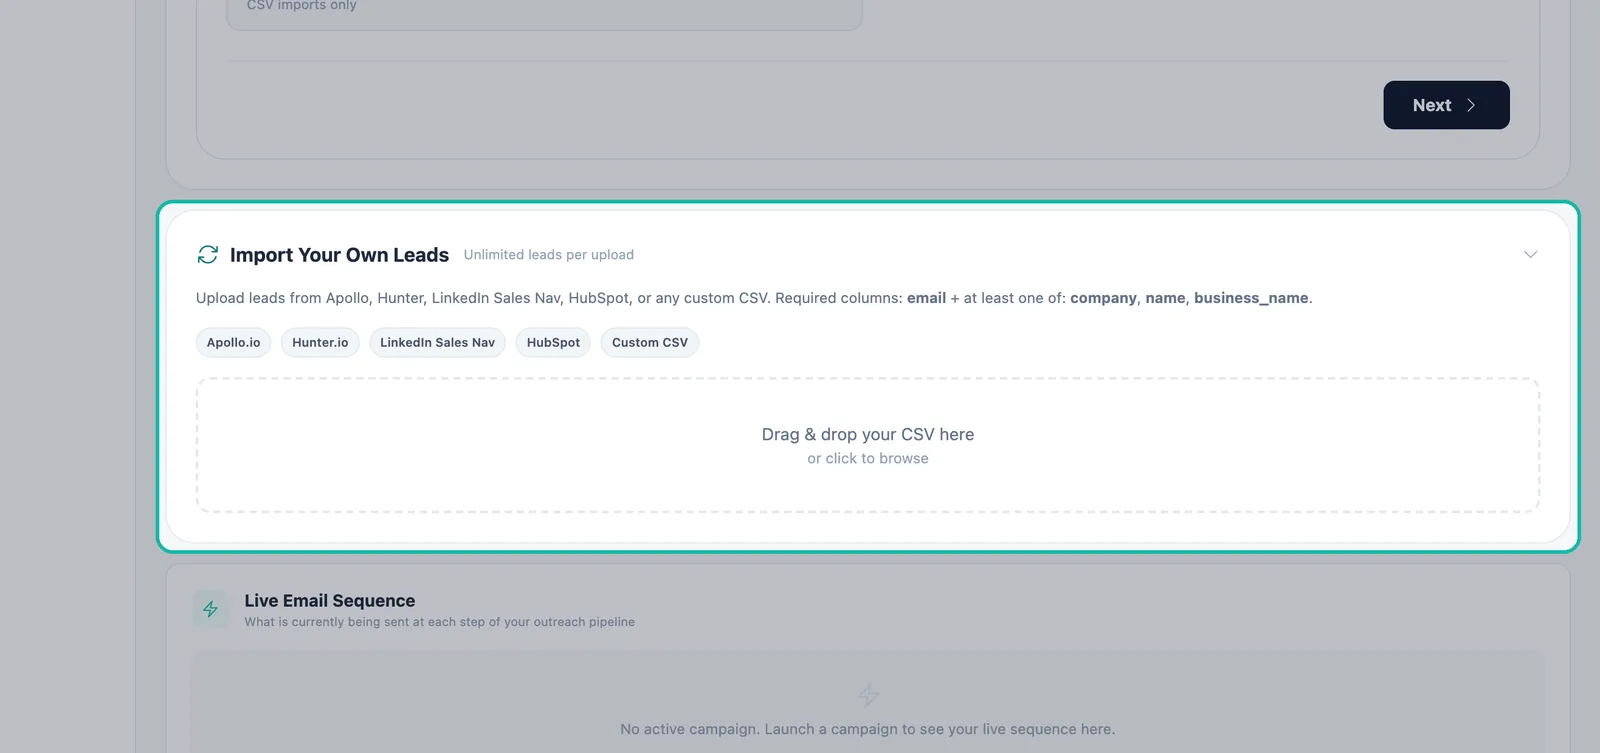
The Import Your Own Leads panel lists the supported sources. Drag & drop your CSV here or click to browse, then select your file. To pick a different file, click to change it.
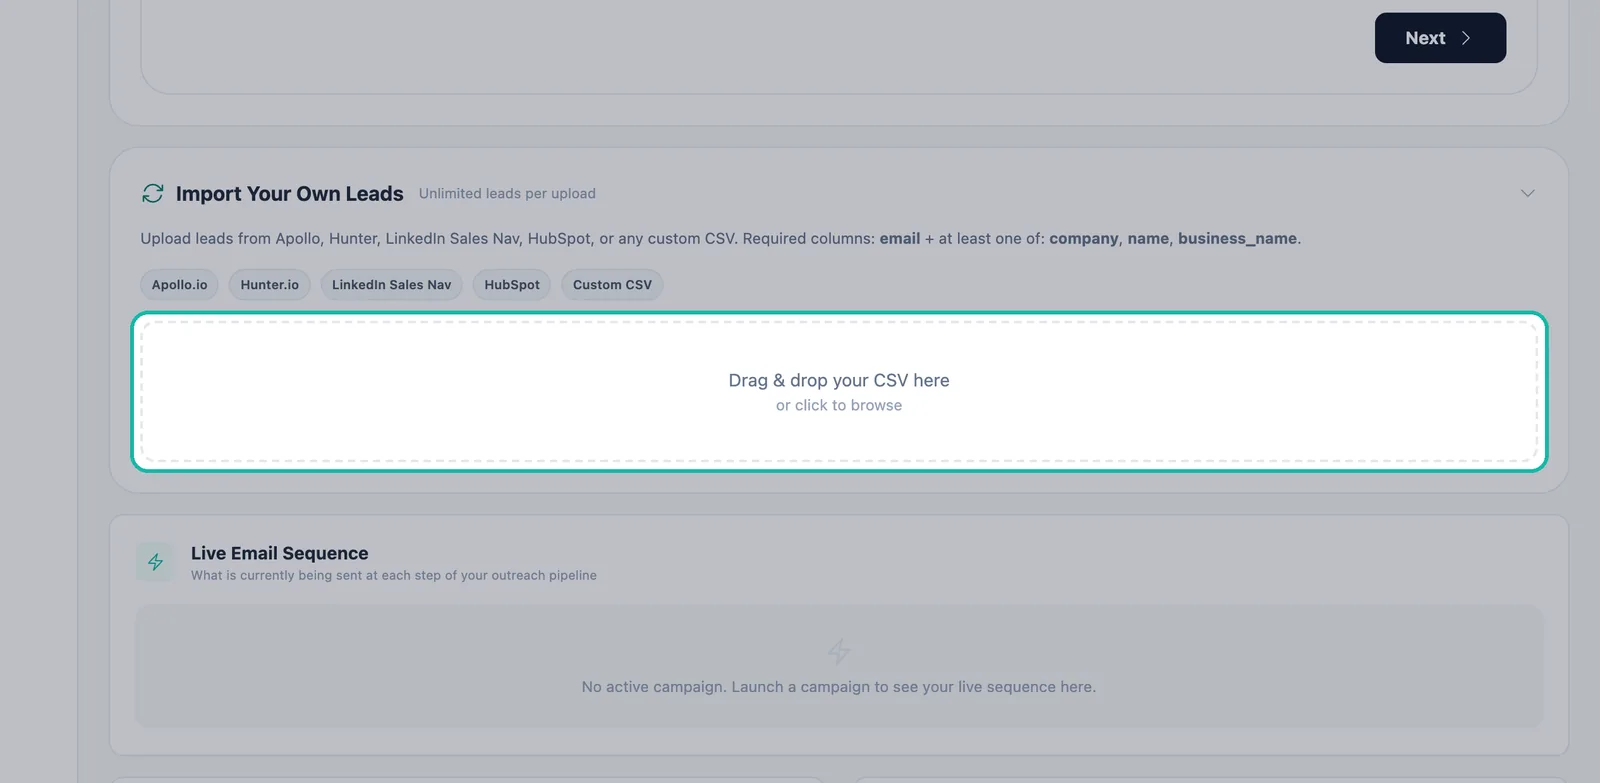
Drop your CSV file here or click to browse. Click Import Leads.
When you see Import complete, read the summary. It shows how many rows were imported, how many were skipped because they had no email, and how many duplicates were ignored.
To upload another list, click Import another file.
What Swashi does with your rows
Your list is cleaned on the way in:
- Rows without a valid email are skipped.
- Duplicates of leads you already have are removed, so nobody is added twice.
- Every new email is validated in the background, after the import finishes.
- Imported leads are scored like the leads Swashi finds, so each one gets an ICP score and tier. See ICP and lead tiers.
Use imported leads in a campaign
When you create a campaign in Email Studio, the Audience step asks for a lead source:
| Lead source | What it contacts |
|---|---|
| All Sources | Sheet and uploaded leads together |
| Sheet Targets | Leads from your connected Google Sheet |
| My Uploaded Leads | CSV imports only |
Choose My Uploaded Leads to contact only the list you imported. The Outreach Agent contacts your uploaded list too. Voice calling campaigns also let you pick the lead source; see voice outreach.
Troubleshooting
- The panel shows "Available on Growth, Agency & Enterprise plans." Your plan does not include importing. Click Upgrade to unlock →, or see the pricing page.
- Fewer leads were imported than rows in my file. Rows without a valid email are skipped and duplicates of your existing leads are removed. Check the import summary.
- Every row was skipped. Make sure the email column header is named email, and that the file also has a company, name or business_name column.
Next steps
Frequently asked questions
Which plans can import leads?+
Importing your own leads from CSV is available on the Growth, Agency and Enterprise plans. Free and Starter accounts see an upgrade prompt on the import panel.
What columns does my CSV need?+
An email column, plus at least one of company, name or business_name. Rows without a valid email are skipped.
What happens to duplicates?+
Duplicates of leads you already have are removed during the import, so the same person is not added twice.
Are imported leads verified and scored?+
Every new email is validated in the background, and imported leads are scored like the leads Swashi finds for you, so they get an ICP tier too.
Can a campaign send only to my imported leads?+
Yes. When you build a campaign, choose My Uploaded Leads (CSV imports only) as the lead source. All Sources combines your sheet and uploaded leads.